Showing posts with label Recipe. Show all posts

Friday, May 1, 2026

Tu B’Shvat Chicken & Rice with Dates, Raisins, and Olives (GF, DF)

Back on Tu b'Shvat, I had this vision of a dish I wanted to make, but I couldn't find a recipe so I worked with ChatGPT to craft one. It didn't work out, but I spent some time noodling how to fix the crunchy rice issue I had, and ultimately this one worked out perfectly! If you try it, let me know what you think. 


Tu B’Shvat Chicken & Rice with Dates, Raisins, and Olives

Feeds a crowd!

Ingredients
  • 2 cups basmati rice, rinsed and drained 
  • 3 lb boneless chicken thighs (or any mix of chicken you want really)
  • 2–3 tbsp olive oil 
  • 3 cups chicken broth or water, boiling hot
  • 1¼ cup orange juice 
  • 1 very large onion, thinly sliced 
  • 4 cloves garlic, minced 
  • ¾ cup green olives, pitted and halved 
  • ¾ cup dates, chopped 
  • ¾ cup raisins 
  • 2 tsp paprika 
  • 1½ tsp cumin 
  • ¾ tsp cinnamon 
  • ¼ tsp turmeric (optional) 
  • 1¾–2 tsp salt 
  • Black pepper 
  • Date honey (to drizzle) 
Instructions
  • Heat oven to 220°C / 425°F. 
  • Toss chicken with olive oil, paprika, cumin, cinnamon, salt, and pepper and set aside while you prep the other ingredients.
  • Then, add the rice to large baking dish and add onion, garlic, olives, dates, and raisins.
  • Mix the boiling water/broth and OJ together and pour evenly over the rice mixture.
  • Gently stir through the center, then smooth flat again. 
  • Top with chicken and drizzle a healthy amount of silan over the chicken. 
  • Put a piece of wet parchment over the top and then and cover very tightly with foil. You don't want any steam to release or the rice won't cook!
  • Bake covered for 45 minutes, until rice is just tender with a slight bite in the center. 
  • Remove foil and parchment and bake ~10 minutes more until chicken is lightly golden. 
If you're eating straight away, enjoy! If you're putting in the fridge and reheating, be sure you let it sit out for about 20-30 minutes before refrigerating. To reheat, do not remove the foil at all -- it'll stay moist and steam nicely as is on your plata. 

Friday, December 26, 2025

Crispy Baked Chicken Bites with Asian-inspired Sauce (Gluten-Free)

I love Chinese food so much, but being gluten-free and living in Israel, there are essentially zero options for crispy, tasty options here. Yes, I could buy some batter or use a recipe from Google, slathered in flour and deep-fried on the stove, but I don't deep fry food. 

So this year, I spent some time with my BFF ChatGPT to figure out the best cornstarch-based recipe because I know that cornstarch creates the crispiest, most golden-brown crust in the oven. So after several attempts, here she is ... the ultimate crispy baked chicken bites. Toss them in your own favorite sauce or use mine! 

If you try the recipe, please let me know what you think. 


Crispy Baked Chicken Bites with Asian-inspired Sauce (Gluten-Free)

Serves: 5-6

Chicken ingredients
1.5-2 lb boneless chicken thighs, cut into bite-size pieces (you can use breasts too)
1 tbsp soy sauce
½ cup cornstarch
1 tsp salt
½ tsp pepper
½ tsp garlic powder
Olive oil spray

Sauce ingredients
1 tbsp sesame oil
2 cloves garlic, minced
1 tbsp rice vinegar
2 tbsp honey
2 tbsp sweet chilli sauce
3 tbsp ketchup
2 tbsp brown sugar
4 tbsp soy sauce 

Instructions
  1. Heat oven to 425°F/220°C. Line a baking sheet with parchment and lightly spray it with olive oil. 
  2. Pat the chicken pieces as dry as you can. 
  3. Put the chicken pieces in a bowl and toss with the soy sauce. 
  4. Add cornstarch, salt, pepper, and garlic powder, and toss to coat until every piece looks dry and chalky. 
  5. Spread chicken in a single layer on the baking sheet and then spray lightly with oil. 
  6. Bake 15 minutes. 
  7. Flip pieces and bake another 15 minutes until crisp and golden. 
  8. In the last 5 minutes of baking, add the sauce ingredients to a pan, and bring to a boil for about a minute until it’s thick. 
  9. Remove the chicken from the oven and toss the chicken in the sauce.
  10. Serve with rice and broccoli.


Thursday, November 13, 2025

Moist, Kid-Friendly Carrot Cake Muffins (Gluten free and Dairy free)


I’ve been on the hunt for carrot muffins my kids actually like, but after trying a couple dozen recipes, nothing worked. So I got creative, ran my recipe by ChatGPT, and made my own “Frankenstein’s monster” carrot cake-style muffin! 

Don't forget to read the notes! I hear from everyone about the consistency, but you just have to trust me here. Ready? Here you go:


Moist, Kid-Friendly Carrot Cake Muffins (GF, DF)

Makes 12 standard muffins

Ingredients

Dry mix
  • 1½ cups flour*
  • ¾ cup sugar
  • ½ teaspoon cinnamon
  • ½ teaspoon baking soda
  • ½ teaspoon baking powder
  • ¼ teaspoon salt

Wet mix
  • ½ cup vegetable oil
  • ⅓ cup brown sugar
  • 2 large eggs
  • 1 teaspoon vanilla extract
  • ~2 cups finely grated carrots*
*Notes
  • I’ve used Bob’s Red Mill’s GF 1:1 flour and regular all-purpose flour for this. It’s very flexible. 
  • I’m lazy and buy the bagged shredded carrots. Then, I take out some frustration by cutting them up with scissors to make the pieces super bite-sized! You can shred your own if you want, though. 
  • The dough will be VERY (like super) thick, and that’s exactly how it’s meant to be. 

Instructions

  1. Preheat the oven to 350 degrees F (175 degrees Celsius) and line a muffin tin with paper liners (or pull out a silicone cupcake pan). 
  2. Dry mix: In a bowl, whisk together the flour, white sugar, baking soda, baking powder, cinnamon, and salt. 
  3. Wet mix: In a second bowl, mix the oil, brown sugar, eggs, and vanilla. Then, add in grated carrots.
  4. Pour the wet mix into the dry mix and stir until completely mixed. It’ll be thick!
  5. Divide the mixture between the 12 spots on your muffin pan. (I use an ice cream scooper for this.)
  6. Bake in the oven for 20-25 minutes until a toothpick comes out clean. 
  7. Cool for 10 minutes and then transfer to a cooling rack.
Store at room temp for ~3 days or keep in the fridge up to 2 weeks. Reheat in the microwave for maximum yums.

If you make these, please let me know what you think in the comments. 

Tuesday, September 27, 2016

Tis the Season: The Best-Ever Gluten-Free Honey Cake Recipe!

I love this time of year. The seasons are changing, the weather is cooling, and layers, ankle boots, and scarves are starting to pop up here, there, and everywhere. It also means it's time for the Jewish High Holidays of Rosh HaSHanah and Yom Kippur!

The latter is filled with fasting and deep reflection and prayer, while the former features joyous celebrations complete with a classic: apples and honey.

Asher wanted to shoot some photos of the delicious honey. Great shot, kiddo!

Luckily, I received a boatload of L.R. Rice Raw & Unfiltered Honey and Rice Family Raw & Unfiltered Honey for review, which means it's time for honey cake!

Now, one of my greatest gripes around any of the Jewish holidays (except maybe Passover, because gluten disappears from everyone's tables for the most part) is that I can't enjoy any of the awesome baked goods out there. Lucky me, I recently discovered Cup4Cup Flour, which, honestly folks, really does work like the real thing. I've made muffins, we've made beer-battered fish (which my British husband wholly approves of), and even challah. Yes, I'm trying to perfect a simpler gluten-free challah recipe using Cup4Cup, too. 

In the meantime, I've made this amazingly delicious, non-dairy, gluten-free honey cake for your enjoyment! Are you ready?

Chaviva's Best-Ever Gluten-Free Honey Cake

Ingredients
3 eggs
3/4 cup sugar
1 cup strong black coffee (I used tea)
2 tsp baking powder
3 Tbls Earth Balance Vegan Buttery Sticks (or margarine), softened
1 tsp baking soda
1 tsp cinnamon

Directions
  1. Preheat the oven to 325 degrees F. Grease two 8x8 baking pans or one 9x13-inch cake pan.
  2. In your Kitchenmaid or other mixer, beat the eggs and honey together. 
  3. Add sugar and mix again. 
  4. Mix baking powder with the coffee and "butter," and then add it to the egg mixture.
  5. Add baking soda, flour, and cinnamon. 
  6. Beat until well combined. 
  7. Pour into the prepared pan(s) and bake for 55 minutes or until a toothpick comes out clean. 
Enjoy! Let me know if you make this and what you think. It's rich, sweet, dense, and the ultimate snack. You know what, I'm going to make another cake now ... 

SaveSave

Tuesday, July 12, 2016

My Fat Dad: Book and Nosh Review + Giveaway

[Giveaway at the end of the post!]

I grew up in a house where the Diabetic Diet reigned supreme. I remember measuring cups of green beans hitting the plate off and on my entire childhood, peppered with frequent visits to Red Lobster (mom's favorite for holidays and birthdays), Benitos (a Mexican restaurant) for piled-high plates of beans and cheese, and McDonalds and Sonic for burgers, fries, and drinks with my father's beloved crushed ice. Everyone in my immediate family has battled with weight and diet pretty much our entire lives, and (except for me who has been privileged to always be on the more voluptuous side) has swung between thinness in their younger days to larger waistbands in their 20s and beyond.

My mom and dad never went to the dieting extremes that Dawn Lerman's father did in My Fat Dad: A Memoir of Food, Love, and Family, with Recipes, but I can relate to growing up in an environment where food obsession was manifest in countless ways — both constructive and destructive.

When I was contacted about reviewing My Fat Dad, I jumped at the chance because from a quick look it seemed like something that would really resonate. Although it became clear that Lerman and I didn't grow up with the same relationship with food, I have to say it was a really fascinating and entertaining read. For the first few chapters I was confused, as Lerman focused largely on her tenuous and tentative relationship with her mom, but as the book went on I understood why she wrote the book the way she did.

Both of her parents are Jewish, and both grew up in a post-Holocaust world with parents uniquely obsessed with classic Jewish food. However, whereas her actress mom grew up with an "eat to live" mindset, her advertising guru of a father grew up with a "live to eat" mindset. The author, Lerman, subsequently found herself obsessed with food — cooking it, baking it, understanding how it fits into specific diets, how it could save her dad, how it could comfort her sister, and more.

Unlike me, however, Lerman managed to end up with a pretty healthy relationship with food, thanks to her grandmother "Beauty," who taught her how to make just about anything and everything. Lerman ended up seeing the world through food. I didn't learn how to make anything growing up, so my relationship with food has always been tense, with binges (and starvation periods when I was a teen) and purges of the things that I love. It wasn't until I was in my mid-20s that I started to really explore and understand food in the way that Lerman did her whole life. I learned that steak didn't have to be overcooked, vegetables didn't always come out of a can, and the microwave wasn't necessarily my best friend. (Honestly, I think becoming kosher saved me and my health, because fast food was my BFF most of my life.)

Food, for Lerman, was a source of nurturing and healing when it came to her relationship with her parents and sister and grandparents, and that's something I so admire. I honestly think that the more a child grows up understanding and experimenting with food, the more healthy their overall relationship with food and the more there is a balance between "live to eat" and "eat to live," and I think Lerman's a really powerful example of that reality.

My Fat Dad really takes you on a food journey, both her obese father's journey and battle with food in the fast-paced world of advertising and her own journey to understand and explore all of the food options the world has to offer.

The most unique thing about this book is that each chapter ends with a few recipes based on conversations and events in the chapter. Lerman has created a cookbook based on stories, which is, let's be honest, what healthy relationship with food looks like (if years of watching countless hours of the Food Network has taught me anything). She has recipes for everyone, from a classic borscht to a No Bake Pecan Pie and Healing Mushroom Miso Soup.


I chose to focus on Peanut Butter Love—the Best Flourless Blondie recipe from a chapter where Lerman talks about her relationship with her sister and how she used to bring or send treats to her sister, who was traveling and acting in "Annie" (because their mom wasn't focused on food/treats). Lerman made blondies and other sweet treats for her sister, and that was one of the ways that the two of them were able to bond across the miles between them. Here's the recipe (and they really are to die for):

Ingredients
  • 16 ounces natural, no sugar added peanut butter
  • ½ cup pure maple syrup
  • ½ cup original soy milk or nondairy milk of choice ( I use ones that have about 7 grams of sugar per serving)
  • 1 ripe banana, mushed
  • 2 eggs, beaten
  • 1 teaspoon vanilla
  • ½ teaspoon salt
  • 1 teaspoon baking soda
  • ¾ cup dark, semisweet chocolate chips
  • Butter or oil for greasing the pan
Directions
Preheat oven to 325 degrees. In a bowl, mix the peanut butter, maple syrup, milk, and mushed banana. Mush it all up and combine well. Then mix in the beaten eggs, vanilla, salt, and baking soda. Mix together until well blended and smooth. Stir in half the chocolate chips. Pour the batter into a well-greased 8-inch-square Pyrex dish. Scatter the remaining chips on top.

Bake for 55 minutes, checking after 15 minutes to make sure the edges do not get too brown. If the top looks very brown, cover with foil and bake for the remaining 40 minutes. Cool and serve.

Note: Mine got a little too brown because I got distracted with the baby ... I recommend cooking for 15 minutes and covering with foil for blondies that aren't so brown. 


GIVEAWAY! Comment on this post and let me know what your relationship with food was like growing up. I'll pick one winner at random on July 19, 2016, to receive a copy of this book. 

Rules: Open to U.S. residents only. Must comment to be entered. 

Sunday, February 8, 2015

The Best Gluten-Free Challah Recipe You'll Find

Best-Ever Gluten-Free HaMotzi Challah Recipe

Nearly two years ago I posted up a few of the recipes I was relying on for making gluten-free hamotzi challah (meaning bread that I could wash and say a blessing on for Shabbat). I don't make or eat this bread during the week, because it'd be too expensive and time consuming, but for Shabbat it's important to have bread you can make a bracha (blessing) on. I've gone through a dozen different recipes, flour mixes, even trying Bob's Red Mill's new 1-for-1 gluten-free mix, all with terrible luck.

The facts:
  • For challah (or matzah for that matter) to be hamotzi, it needs to include at least 51 percent of one of the following grains: barley, wheat, oats, spelt, or rye. (See this Chabad.org article for their take on oat matzah.)
  • Gluten-free oats are those that are grown in dedicated fields and produced in dedicated facilities. (Traditionally, oats are grown in fields surrounded by wheat, creating cross contamination.)
  • Many people can't eat even gluten-free oats, despite the fact that it has been proven time and time again that the gluten in oats is not like that of barley, wheat, spelt (a type of wheat), and rye. 
  • Spelt is not gluten free. It is in the wheat family.
  • Gluten-free challah is, in my experience, unbraidable because the consistency of the dough is akin to cake batter, not traditional bread dough. For this reason, I recommend getting a mold you love, like the Kosher Cook's "challet" silicone pan, which is what I used for this recipe. 
And now, with our further ado, the recipe that I have been perfecting in my kitchen, that Asher prefers to regular challah and that was recently a hit at a friend's conference.

I've separated the recipe out in a way that makes sense to me. I like to see everything in parts -- ingredients (wet and dry), mixing, rising, and baking. It just makes more sense to me because then I can plan out how long things will take and what kind of attention I need. Ultimately, this recipe is very low fuss.

The Only Gluten-free Challah Recipe You'll Ever Need
Makes 4 challets

Ingredients: Get everything measured and mixed beforehand, lest your yeast/sugar mixture go crazy. 

For the Rise
  • 2¼ tsp dry yeast or 1 envelope
  • 1 tsp sugar
  • 1/4 cup warm water
Dry Ingredients
  • 2 1/4 cups GF oat flour (I grind my own)
  • ½ cup GF rice flour
  • ¼ cup GF potato starch
  • ¼ cup GF tapioca flour
  • 1½ tsp salt
  • 2 tsp xanthan gum
Wet Ingredients
  • 1/4 cup honey
  • ¼ cup canola oil
  • ½ cup almond milk
  • ½ cup warm water
  • 2 large eggs
For Baking
  • 1 egg yolk
Mixing (10 minutes)
  1. Preheat the oven to 200°F.
  2. Dissolve the teaspoon of sugar in the ¼ cup warm water. Add the yeast, mix well with a fork for about 15 seconds, and set aside until frothy, about 5 minutes.
  3. Measure and combine the dry ingredients in one bowl, getting rid of clumps. 
  4. Combine the honey, oil, milk, eggs, and warm water. 
  5. Pour the wet mixture into the dry mixture slowly and mix to combine. 
  6. Add the yeast mixture from the first step. 
  7. Mix well for 3-5 minutes (I do it all by hand, folks, but feel free to use your mixer). The mixture will be a little runny, but shouldn't be too runny. UPDATE: I found that using my KitchenAid and having it run with the whisk attachment for about five minutes got a lot of air in the dough, which made it rise better and it turned out to be much lighter and tastier as a result. 
  8. Turn the oven off. 
Rising (~ 2 hours)
  1. First Rise: Cover the dough bowl with parchment paper and leave in the warm (but off!) oven for about 1 hour or until the dough has doubled in size.
  2. Take the bowl out and turn the oven back on to preheat to 200°F.
  3. Stir the dough down and spoon into your lightly greased pans -- small loaf pans work, but I use the challet pan, and this recipe makes 4 challets.
  4. Turn the oven off.
  5. Second Rise: Cover the pan(s), return back to the warm (but off) oven, and let rise again for another 40 minutes or so, until the dough has doubled.
  6. Remove the rising challah from the oven. 
Baking (~ 30-35 minutes)
  1. Preheat oven to 375°F. 
  2. Part One: Bake uncovered at 375°F for 15 minutes.
  3. Line a cookie sheet with the parchment paper you used to cover the dough. 
  4. Remove pans from oven and invert half-baked loaves onto the cookie sheet. They should be solid at this point. 
  5. Lightly glaze loaves with the egg yolk, then return to oven.
  6. Part Two: Bake uncovered at 375°F for 15-20 minutes. You'll want the tops to have a nice, golden brown coloring. 
  7. Move to wire rack to cool.
Enjoy! Let me know if you have any trouble with this recipe. I edited it a million times to get it here. 

Wednesday, July 24, 2013

At last! Gluten-Free Cinnamon Rolls


Um, it smells really good in here.

I can't tell you how long I've been craving cinnamon rolls. When I was living back in the U.S. I did the best I could to consume the closest thing I could find to classic cinnamon rolls, but unfortunately Udi's take on the gooey classic just didn't compare to anything I knew.


Living in Israel, you can't go anywhere without the smell of freshly baked pastries wafting every which way, which makes it tough for a gluten-free foodie. The benefit of being me is that I'm not constantly noshing the crap people buy at bakeries (once in a while is fine, but some people feed their kids this stuff daily). The downside is that it means I have to seriously muss up the kitchen to make something delicious to satisfy that fleeting desire.


So cinnamon rolls. I found this recipe over at Sarah Bakes Gluten Free and got a few recommendations for her recipes being very stand up, and it turned out to be a pretty easy recipe to follow and put together. I had to do some modifications because I didn't have any dairy-free milk on hand, just lactose-free milk, and it's tough to find honest vegan butter in this country (if I could import Earth Balance, I would). I also used her lighter version of the flour blend as she suggested, which seemed to be the best option available.


I'll was really surprised at how easy these were to roll, because my past attempts at cinnamon rolls using recipes from You Won't Believe it's Gluten Free! ended up in a mushy mess that was more like a coffee cake than cinnamon rolls. I'm super pleased with this recipe and can't wait to make them again.


These rolls proved perfect, absolutely perfect! Crisp on the top, and with that gooey center, they hit the spot in a way that no factory-produced gluten-free cinnamon rolls ever will.

The question is: Will these last until Shabbat ...?

Sunday, June 2, 2013

Recipe: The Vegan Loaf


This past Shabbat, I regaled my dear Mr. T with a classic Edwards Family favorite: Meatloaf and Mashed Potatoes. The big changeup? This loaf was completely vegetarian, but it was hearty and full of tummy-warming goodness. I anticipate this being a regular on my menu, mostly because the ingredients are inexpensive and the recipe is very versatile.

Brown Rice and Lentil Terrine
(adapted from Clean Eating)

1 cup brown rice
1 cup brown lentils
olive oil
1/2 onion, finely chopped
2 cloves garlic, minced
2 whole eggs (or egg substitute)
2 Tbls flaxseed meal
2 Tbls tomato paste
1/4 cup flat leaf parsley, chopped finely
1/4 cup black olives, drained and chopped
1/4 tsp each coriander, paprika, garlic powder, and onion powder
1/4 tsp sea salt
1/2 tsp freshly ground black pepper
1/2 cup low-sodium vegetable broth, divided
1 1/2 cups gluten-free breadcrumbs, plus more if needed (I blended up gluten-free cereal, but you can also use regular or gluten-free bread)
  1. Cook the rice (I used a rice maker), then put the lentils on with 2 cups water. Bring to a boil, then reduce to simmer, partially covered, until tender, about 35 minutes. 
  2. Preheat the oven to 400 Fahrenheit (200 Celsius). Prep a 9x5" pan with olive oil, butter, or PAM. 
  3. Heat about a tsp of olive oil in a skillet on medium and add onion. When the onion starts to brown, stir in garlic and cook 1 minute more. Transfer to a large bowl and stir in eggs, flaxseed meal, tomato paste, parsley, olives, spices, salt, and pepper. Add the breadcrumbs and mix thoroughly. 
  4. Put half of the cooked lentils in a food processor with 1/4 cup of the vegetable broth and process until smooth. Transfer the pureed and whole cooked lentils to a bowl and mix in the rice and remaining 1/4 cup of vegetable broth. Mix well!
  5. Finally, mix both of the rice/lentil and onion/spice mixtures together until well combined. 
  6. Scrape into the prepared loaf pan and mound the center to make it look like that classic meatloaf. Bake until lightly browned and crunchy on top, about 35-40 minutes. 
  7. Serve with your favorite brown gravy!
The original called for wild rice, green lentils, Bragg's Liquid Aminos, fresh basil, fresh sage, and pimento-stuffed green olives, but I didn't have them on hand so I just worked with what I had. It turned out amazingly!

For a gravy, I used this recipe because I didn't have any mushrooms on hand. However, I used half of the amount of water it called for and Brown Rice Flour instead of the called-for Chickpea Flour. 

Monday, March 18, 2013

Wake Up! It's Sunshine Polenta Time


First of all, I have to apologize for the ch-ch-changes going on here on the blog. I wanted something new and fresh to go with my new and fresh existence in Neve Daniel with Mr. T and iBoy, but I'm working out some major kinks. You'll notice that at the bottom of this post from the homepage you won't see any comment link. Nope! You have to click on the title to get into the post and then comment. Argh! Sorry for the frustrating changes, but hopefully I'll get them worked out super stat. You will be happy to note that you can now easily email me through the little GMail envelope link over there on the right.

Now on to that delicious dish up there. The amazing bowl was a wedding gift set from the amazing Schleids, and I can't express how much I love them. We use them for everything -- prep, eating, serving, you name it. We now need to find more of them because of our intense love of said bowls.

I call this Sunshine Polenta because it'll smack you in the face with freshness and wake you up. There are a lot of ways to make it versatile, but it's gluten free, dairy free, and vegan. feel free to throw on some Greek yogurt or something else to make it your own, but this is how I do it.


On the stove, bring 2 cups of any combination of orange juice, almond/rice/coconut milk, and water to a boil. I used a 1 cup almond milk, 2/3 cup OJ, and 1/3 cup water ratio for mine. Once it's boiling, pour in 1/2 cup polenta and stir as the mixture comes back to a boil. Once it's boiling and bubbly in orange deliciousness, let it cook at medium heat for 3-5 minutes. Whisk it good, then take it off the heat, cover, and let it sit for at least 5 minutes.


Using an orange or a tangerine, zest the heck out of the polenta until you're heart's content. Slice up pieces of the orange or tangerine and top the polenta (it took about half a tangerine for me).

I topped mine with walnuts, flax meal, coriander, cinnamon, and a drizzle of Agave, but feel free to embellish yours with other fresh, healthy toppings.

And then? Devour! Devour it like you haven't eaten in days! Oh, and be sure to make yourself a cup of delicious Vanilla-Nut Coffee to go with it. If you don't have Vanilla Nut, any old cuppa Joe will do.

Betayavon! (That's Hebrew for Bon Appetit.)


Sunday, November 11, 2012

Rainy Days and Sundays

Today it rained. It's actually still raining, a lot. And it's glorious. 


So days like today are meant for soup. Warm, spiced soup. 

Served in a coffee mug, of course. 

I woke up today not feeling very well. I'm guessing it's the abrupt change in weather, as it tends to do this to me. So I've got a sore throat and every last inch of my bod is aching and sore. 

My Shabbat in Neve Daniel was beyond outstanding, but it was incredibly cold and windy up there, which smacked me in the face because I was ill prepared. I looked at the weather, it said roughly 63 degrees F, so I assumed a scarf would do me. What I forgot is just how quickly the clouds move there and how windy it does get. I sleep best when it's cold, however, so you can only imagine how well I've slept the past few nights!

The beautiful thing about Neve Daniel is how tight-knit the community is. The shul was beautiful, and even the 99 (or was it 100) stair climb to get there wasn't as bad as I had anticipated. The friendship, the warmth, the children everywhere -- this is my Judaism. Perhaps someday, when I'm hitched, I'll end up in Neve Daniel with all of my amazing friends there. 

Until then, I'll warm myself up with homemade soup. 

I schlepped out in water-proof rain jacket and sneakers to pick up potatoes, apples, eggs, coconut milk, and other essentials for soup-making and weekday meal basics. I threw this together on the fly. Don't ask for specifics, because I can't provide them!

Cinnamon Apple Sweet Potato Spiced Soup
2 green apples, large dice
2 sweet potatoes, large dice
1 regular potato, large dice
1 yellow onion, small dice
1/2 can organic coconut milk
water (or vegetable broth)
coriander
curry
cinnamon
salt
olive oil
toasted walnuts
  1. Sautee the onion until translucent. 
  2. Add cinnamon. 
  3. Pour in the apples, potatoes, and enough water to cover the vegetables. Bring to a boil, reduce heat, cover, and cook for about a half-hour or until everything is tender. 
  4. Pour in the coconut milk, dabble with the spice mixture, and puree. 
  5. Once you've gotten the flavor right -- to your liking, you'll figure it out -- top with toasted walnuts and enjoy. 


Monday, September 24, 2012

It's a MoSHY Life for Me!

Motzei Shabbat cooking ... sweet squash stuffed with lemon-pepper rice.

I've returned to the classic tradition of some of our greatest scholars ... the tradition of MoSHY -- Meat on Shabbos and Yontif. After spending a good bulk of the year as a vegan, I recently started eating fish again, and then with the holidays appearing I realized that my dietary restrictions made me a tough guest for people. So I've opted to be MoSHY for the time being. So the things I'm not eating? Dairy, gluten, and "added" sugar. And meat. But only during the week. 

Food is so complicated, but I've discovered that my body isn't absorbing the right nutrients, at least not in the right capacity, so I'm hoping consumption of fish and some meat will get my body back on track. My aliyah flight is kind of a bummer because I have two options: Gluten Free w/Meat or Vegetarian w/Gluten. Clearly I have to order the former. Chances are good I'll be bringing my own nosh on-board. 

So for Shabbat, I whipped up some delicious Dairy-Free, Gluten-Free Salmon Chowder. This recipe was me kind of winging it. I combined roughly four different recipes I found online but didn't like in full, so I picked them apart and put my own together! In the future, I anticipate adding some corn starch to thicken it up a bit and a bit more fish. But overall? Amazing. 

Ingredients
1 large yellow onion, diced 
1 can corn 
2 cups fingerling potatoes, diced 
1/2 bunch kale, roughly chopped 
2 carrots, peeled and diced 
4 cups vegetable broth 
1/2 cup almond milk (or other dairy-free milk)
1/2 cup Original So Delicious Coconut Creamer 
1 1/2 pound salmon fillet, skinned, boned and cut into small cubes 
1/4 cup chopped fresh parsley 
1/2 teaspoon dried dill 
1/4 teaspoon sea salt 
Plenty of pepper 

Directions

  1. Saute the onion and celery until onion is translucent. Add potatoes and saute 5 minutes more. Do not brown. 
  2. Add carrots and stock, bring to a boil, reduce heat and simmer until vegetables are fork tender about 15-20 minutes. You really want the goods to be fork tender.
  3. Add milk, half and half, salmon, kale, parsley, dill and pepper. 
  4. Simmer over low heat 5-10 minutes or until fish is cooked through and liquid is steaming, but not boiling. Throw on some minced chives if that's your fancy.
  5. Add plenty of pepper and salt to taste.

Motzei Shabbat cooking ... a random rice concoction including wild rice,
corn, red pepper, tomato, tangerine, maple syrup, lemon juice, salt, pepper, and ...
I think that's about it. Completely random ingredients I had around.

Wednesday, August 8, 2012

Farmers Market + A Recipe!


I know some of you appreciate my food-related posts more than others, but I can't help sharing some of the photos I took at the Cherry Creek Farmers Market this morning as well as a recipe for Mexican Pilaf.

A coworker decided that we should hit up the Farmers Market before work today. It was a stupendous idea, although once I got to work it was really hard to focus. It still is. Hence why I'm here on Blogger, taking a break from some poster-design and website updates. I love Farmers Markets, and lucky for me, the shuk at Machane Yehuda is like the most awesome Farmers Market EVER!

I bought some okra -- my first time! Have a recipe for okra that you dig? Let me know.


And now ... for the lunch ...


And here's the recipe for Mexican Pilaf from "Crazy, Sexy, Diet" -- a book I highly recommend! This recipe packs a hidden punch that you get at the end of each bite. It's crazy filling, too.

Ingredients
3 cups wild rice, sprouted or cooked
3 tbsp green onions, diced
1 1/2 cup tomato, diced
1/2 cilantro, chopped
2 tbsp fresh oregano, minced
1/2 cup sun-dried tomatoes, soaked 1-3 hours
1 1/2 tbsp miso (Chad suggested white miso)
1 tbsp garlic minced
1 tbsp chili powder
1/2 tsp cumin
2 tbsp lemon juice
3 tbsp olive oil
salt if desired

Directions (Crazy Easy, for reals)
Place rice in mixing bowl and hand toss with the green onions, 1 cup tomatoes, cilantro and oregano. Set aside.

In high speed blender (or hand held one) blend sun-dried tomatoes, remaining tomatoes, miso, garlic, chili powder, cumin, lemon juice, and olive oil until smooth. (Note: I used my mini-chopper. It worked pretty darn well.)

Toss tomato paste with rice and mix well.

Wednesday, July 18, 2012

SNAP Challenge Day 2: Snack, I Can't

Well hello Day 2 of the SNAP Challenge. Let us begin with a recap of everything that happened after that delicious, filling breakfast yesterday.

Yesterday for lunch I rocked out Lentil Taco "Meat" with some homemade corn tortilla cups. One cup of lentils has an amazing 18 grams of protein. I was stuffed after eating them. Don't they look delicious?


Snack time was carrots, but I'll be honest -- carrots just weren't feeling right. So I filled up on office coffee and water instead.

Then, last night, I hit my personal Big Fail, which is that sometimes when I get home from work, I don't have the energy to make dinner despite feeling famished. Well, guess what, folks? When you're on SNAP Challenge, you can't just have a bowl of cereal, unless that bowl of cereal was in your budget, in which case it wasn't in mine.

Sigh.

I was considering just not eating last night, but threw some of my Lentil Taco "Meat" leftovers into the microwave, threw on some corn tortillas, topped with some hot sauce, and in a fit of desperation I cut open some Daiya Pepperjack Shreds to put on top. With a little over $4 leftover from my produce budget and the fact that I haven't opened my Peanut Butter yet, I had the room to fudge. This, of course, means that I'm not opening my Peanut Butter this week. Protein loss for the desperation of fake cheese.

This morning, I decided to mix up my Breakfast Quinoa Cereal. The leftover quinoa from yesterday was in the fridge, so I threw on the same ingredients of cardamom, cinnamon, raisins, and maple syrup, but I also cut up one of my bananas. So I had a cold breakfast cereal that was downright delicious.

Lunch was a gimme -- provided by work for our monthly staff meeting. Yes, it was part of my rules, so I went with it. Hate on me if you want, but that's how it is. After work I went to the gym, after which I was starving, so I came home to a giant bowl of soaked black beans.

Yes, I bought dried beans because they're cheaper. They're less convenient, but as my boss says, "You can have two out of the three: cheap, healthy, fast." So I went for cheap and healthy. I soaked the entire bag of black beans all day, and then drained and rinsed them. I put them in a stockpot full of about 6 cups of water and brought the pot up to a boil. Once it was boiling, I skimmed the foam off the top, brought them to a simmer, and cooked covered for 45 minutes. Draining and rinsing them again, I began to prepare the Sweet Potato and Black Bean Soup, substituting plain old water for the vegetable stock because, well, it's too expensive. Curious where black beans stand? One cup of black beans has 15 grams of protein and 15 grams of fiber!

Crush point. I'm hungry. I want to eat. FEED ME! I have chips and snacks and things I could munch on while waiting for dinner. And here is my major fail when it comes to my diet: I'm a snacker. A hardcore, constant snacker. Vegetables, fruit, chips, you name it, I nosh it. This week is going to teach me that snacking just ain't where it's at.

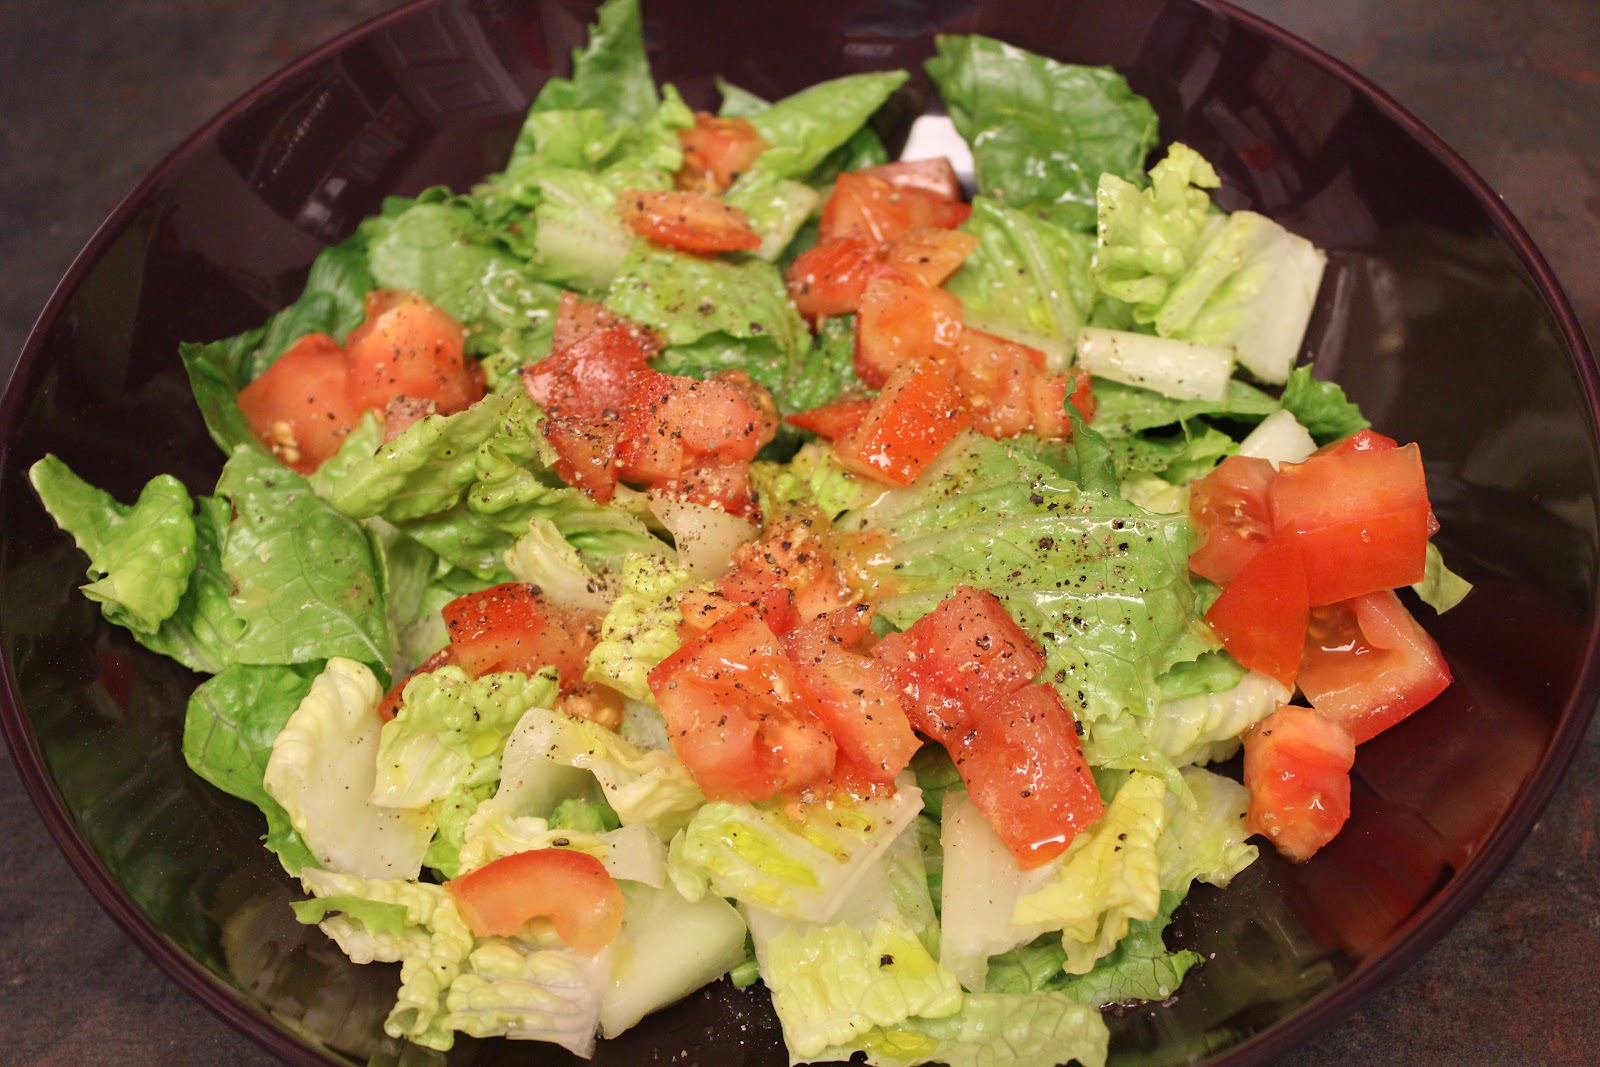
So I decided to sacrifice one of my romain hearts and half a tomato for a simple salad with some olive oil, salt, and pepper. It did the job. Well, that and a giant cup of water. But I was still hungry. Soup, please?

One thing I've learned in becoming an ovo-vegetarian (a vegan that eats eggs occasionally): Spice is everything. If you have salt and pepper, you can do anything. Garlic? Cumin? Cinnamon? Seriously, with spices you can make anything taste good. I've learned to love spices, hardcore style. If I had to live on a SNAP budget permanently, I'd spend every spare penny I had on boatloads of spices.

And now, the soup -- which is delicious, by the way -- pureed with a bit of cilantro on top.


As it stands, I have $2.02 left to spend this week, and that's without having bought my canned white beans for the Quinoa, Kale, White Bean Soup. Here's hoping I can land a cheap can at Wal-Mart with a hechsher?

Also, note to self: Drink. More. Water. The more water you drink, the more full you feel.


Tuesday, June 5, 2012

Dinner Time in Chavi Land

I'm a firm believer in trying out new recipes most nights of the week, but sometimes I get lazy. There are certain things that I just keep in my pantry because I know I'm going to get lazy. Tonight was one of those nights. With about eight loads of laundry to do (it's been about a month), I grabbed a box of brown rice noodles, a bunch of asparagus, some lemons, salt and pepper, olive oil, some tomatoes, some pitted kalamata (auto-correct wants this to be Kalamazoo if you can believe it) olives, and spinach. And voila! Dinner.

After cleaning and trimming the asparagus, I tossed them in olive oil, salt, and pepper, and placed them on a parchment-lined cookie sheets. After dousing them with lemon juice, I roasted them at 350 degrees for about 10 minutes to snackable Lemony Asparagus perfection.


While the asparagus were cooking, I heated a giant pot of water to a boil and removed it from the heat. I tossed in the rice noodles and let them soak (stirring a couple times) for about eight minutes with the lid off. Then drained them in a colander.

Meanwhile, I threw a mixture of hastily chopped tomatoes, kalamata olives, olive oil, salt, and pepper into a saute pan with spinach and heated the goods up.

Bowl, meet rice noodles. Rice noodles, meet random tomato-olive-spinach mixture. Everybody, meet lemony asparagus! Let's call this Rice Noodles with Vegetarian Ragout. Or something like that.


Oh, and if that wasn't enough, I whipped up what I can only call Banana Split Crisp. I seriously rocked this randomly, so just follow me here.


Two bananas sliced, a bunch of cut up fresh pineapple, some frozen mixed berries. Toss 'em with some agave. In a food processor, pulse some gluten-free oats with some oat flour, some chopped walnuts, and some unsweetened shredded coconut. Throw in some butter until it's well combined. Throw the latter mixture on top of the former mixture in a square pyrex (or, if you're like me and the Guti's are holding your Pyrex hostage, whatever container you can come up with). Voila!

Seriously, it tastes like a warm banana split. I highly recommend it!

Sunday, April 1, 2012

Oh Passover! Oh Passover! How Soon You are Approaching!

Oh ... Passover! Pesach! The feast of unleavened bread! The week of pained colon! So on, and so forth. 'Tis the season, folks, are you fully prepared?

I'll just say that I'm not. Period. I bought some stuff to exist as Passover-specific, and I'm planning on taking a bucket-load of things to be kashered tomorrow -- pots, pans, and other bigger items that I can't kasher on my stovetop. But beyond that? I haven't started cleaning and the amount of kosher l'pesach products I've purchased is relegated to some jam, some of the Yehuda Gluten-Free Matzos (which don't fulfill the mitzvah for the seder), and a few other things. I'm trying to buy as little as humanly possible for Passover, largely because over the past three years the volume of things that I had in my dating and married life sort of horrifies me now. When I was married, we had two homes and each of those homes had three sets of everything for everything. We had Meat, Dairy, Parve and Passover Meat, Dairy Parve. Among two homes, that amounted to twelve sets of things. Of course, the Parve weren't full sets, but otherwise, we had it. It was just too much. So I'm going minimalist this year.

Thus, tomorrow, it being the kashering day, also is going to be the "start the cleaning" day. I've got a kosher l'pesach Smoothie Maker for all of my liquid-diet needs, and I'm planning on doing a lot of salads and eggs.

And on that note, I'm also going Sephardic. That means I plan on digging through piles of rice to get all the bad things out, so that come Friday night, I have clean, kosher-for-Passover rice. I probably won't delve too much into beans, but I do plan on having quinoa around. Flax Seed also is a friend of mine, so you can expect that will be in the diet plan, too. Also? I was elated to find out there are certain brands of Rice and Almond milk that are good for Passover (for Sephardim) WITHOUT certification. Color me stoked! (Find the Sephardic kosher-for-Passover products list here.)

Luckily, I have a pantry that I can simply close off, and I plan on taping off all of my cabinets, too. This is going to be live-on-the-counter Passover.
x
The reality, lucky for me, is that there really isn't any chametz in my home to begin with. The only thing that is chametz are the gluten-free oats that I have. Otherwise, this is a 24/7/365-chametz-free zone. Does that mean any less cleaning? Nope. Oats are chametz, and thus hardcore cleaning is a must.

I'm also one of those people who always ascribed to the idea that on Passover, a house should be completely clean of chametz. You have plenty of warning, you know when Passover is, so eat all of your bread and cereal beforehand. I've never bought into this whole "sell your chametz" thing. It just seems like a cheap copout. But this year? Well, the gluten-free oats that I have are from Trader Joe's, and I have an entire unopened bag of them. There are no Trader Joe's near here, and the other gluten-free oats I can purchase are hella expensive. So I'm being that person this year: I'm keeping my oats, locking them away, and feeling like a hypocrite.

In addition, I'm planning to do a hardcore car-cleaning scrub down this week. We all eat in our cars, we can't lie about it. Whether it's a snack or a coffee or a nosh, we do it. I have, without a doubt, eaten some delicious oat-based granola bars in my car, and that's chametz, so I'm going to vacuum the heck out of my car. Plus, it's a good time for Spring Cleaning, so why not?

But I have a week to do all of this. I really need to do a bit of meal-planning so that I have everything I need once Friday attacks. I have plans for both of the seders, yet no plans for the last days of Passover. In between, I plan on my staples of Matzo + Cream Cheese + Jam for snacking and lots of smoothies and raw foods for meals. Still, it's going to be a rough week as a Gluten-Free Vegetarian. I might have to cave and rock out some fish this week.

If you're in a last-minute rush and need some help with finding a seder, figuring out the rules and regulations, or are looking for some gnarly recipes, here are some helpful resources!
  • Passover.org | Yes, it's run by Chabad. They own the domain. I think this is impressive! Their website has everything from the blessings to a bounty of recipes that will leave you giggling with joy. I highly recommend the Lemon Ice Cream. Also, they have a calendar to keep you on track with what you're supposed to do when. Print it out, and abide!
  • Vegetarian Times Super Seder | If you're like me, you're looking for filling, protein-packed vegetarian meals. These recipes sound delish!
  • Oranges + Seder Plates | If you're curious what the history is, read my post on it. 
  • Unconverted at the Seder Table? | Yeah, it came up once. It's an interesting thing to consider. Then again, we're supposed to have strangers at our table!
  • JoyofKosher.com | It is what it is. A seder-plate full of recipes!
  • The Orthodox Union | They have everything you could need up -- a sefirat ha'omer chart, a guide to foods, and more. Check out their digital magazine here. 
Have any questions you think I can answer? Just let me know!

Friday, March 16, 2012

Gourmet Grille via Chavi


Can you still call it "grilled" if it isn't grilled? I've never thought of this before tonight when I was cooking a Gourmet Grilled Cheese sandwich to go with my homemade Tomato Soup. I simply buttered the gluten-free bread and cooked in a pan -- no grilling involved! Then I realized, my entire life we never grilled any sandwiches.

Perplexing!

The sandwich included Apricot Preserves (Trader Joe's), Sautéed Spinach with Salt & Pepper, Feta Cheese (also from Trader Joe's), and fresh Dill. Sounds strange, right? Well, it was delicious. Absolutely comforting and gourmet, if I do say so myself.

The soup? Well, I can't really say what went into it. Just lots of spices and tomato puree and vegetable stock and, you know, the usual suspects for tomato soup!

Overall, delicious, easy, simple dinner.

Monday, November 28, 2011

Recipe: Indian-Spiced Roasted Squash Soup


I'm planning some heavy posts this week, so I thought I'd start things out simple and light with a recipe for some delicious soup I just whipped up with pleasure and fresh veggies. If things go right, I'll be eating lots of veggies and yummy things like quinoa all week. Wish me luck to stick to it!

Indian-Spiced Roasted Squash Soup
Adapted from November 2011 Cooking Light Magazine

Ingredients
1 medium chopped yellow onion
8 ounces carrots (that's about three normal-sized carrots)
1 medium butternut squash, peeled and cut into 1/2-inch cubes
1 medium acorn squash, quartered
olive oil
black pepper
2 cups water
1 tsp curry powder
1/2 teaspoon garam masala (I winged it with cumin, coriander, turmeric, cinnamon, nutmeg)
1/8 tsp red pepper flakes
14 ounces veggie stock
1/4 tsp kosher salt
1 container plain yogurt (Greek is best, but I used Green Valley Lactose Free Yogurt)
6 Tbls honey

Preparation
  1. Preheat oven to 500 F.
  2. Arrange the veggies (onion, carrot, squash) on a jelly-roll pan. Drizzle with oil; sprinkle with pepper. Toss. Roast at 500 F for 30 minutes or until vegetables are tender, turning once. Cool for 10 minutes. Peel acorn squash; discard skin.
  3. Combine vegetables, water, veggie stock, curry powder, garam masala, and red pepper into a pot and bring to a boil. Cook for 10 minutes, stirring occasionally, and stir in salt. Remove the pot from the stove and puree with an immersion blender.
  4. Combine yogurt and honey, stirring well. Swirl atop the soup!
  5. Voila! Enjoy!